
A proper wash-and-cure workflow is essential because it directly impacts the durability, surface quality, and accuracy of your resin prints. Even high-resolution models can look rough or weak if residual resin isn’t fully removed or properly cured, leading to surface flaws and reduced strength. Focusing on the process guarantees your prints are stronger, smoother, and more professional. Keep going to discover how mastering this step can truly elevate your 3D printing results.
Key Takeaways
- Proper wash-and-cure ensures surface quality and durability, which resolution alone cannot guarantee.
- Effective post-processing removes residual resin, preventing surface imperfections that resolution marketing overlooks.
- Correct workflow enhances model strength and accuracy, beyond just achieving high resolution.
- Wash-and-cure practices improve layer adhesion and reduce defects, crucial for reliable, high-quality prints.
- Prioritizing workflow ensures consistent results, making models more professional and long-lasting than resolution-focused marketing.

ANYCUBIC Wash and Cure 3, Upgraded Volume 2 in 1 Wash and Cure Station, with Gooseneck Lights, for Mars Anycubic Photon Mono 4 2 Resin 3D Printer, Washing Size of 165 x 100 x180 mm
【Larger Size for Upgraded Capacity】Compared to Anycubic Wash & Cure 2, Wash and Cure 3 has an impressive…
As an affiliate, we earn on qualifying purchases.
As an affiliate, we earn on qualifying purchases.
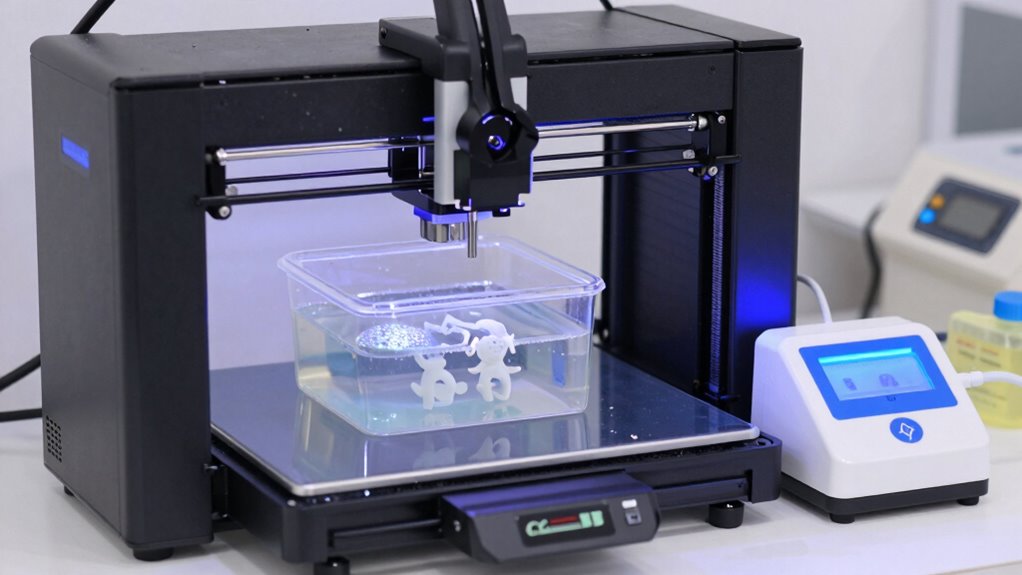
What Is Resin Wash-and-Cure, and Why Does It Matter?
Have you ever wondered why proper resin wash-and-cure processes are essential for high-quality 3D prints? It all starts with understanding resin chemistry. After printing, uncured resin remains on the surface, which can cause surface imperfections or weaken the final product. Washing removes residual resin, but the process must be thorough to prevent sticky or cloudy surfaces. Then, curing solidifies the print, and curing temperature plays a critical role—too high or too low can affect layer bonding and strength. Proper wash-and-cure techniques ensure your print achieves maximum clarity, strength, and detail. Additionally, understanding the resin chemistry involved can help optimize your workflow for better results. For example, appropriate curing temperature is vital because it influences the polymerization process and final product quality. Skipping or rushing these steps can compromise the entire project, making your print less durable and less accurate. Mastering this workflow is essential for high-quality, reliable results, especially since post-processing techniques directly impact the durability and appearance of your finished piece.
LET'S RESIN UV Light for Resin Curing, Portable Mini 365nm UV Flashlight Black Light, Faster Cure LED Waterproof UV Lamp Rechargeable for Resin Molds, Pet Urine, Dry Stains, Bed Bug
Revolutionary Curing Method: Say goodbye to waiting around for UV light curing! With our UV flashlight, you can…
As an affiliate, we earn on qualifying purchases.
As an affiliate, we earn on qualifying purchases.
How Proper Wash-and-Cure Improves Resin Print Quality

Proper wash-and-cure techniques boost your print quality by ensuring better layer adhesion and fewer weak spots. They also remove residual resin that can cause surface imperfections, leaving a cleaner finish. As a result, your prints become stronger, smoother, and more professional-looking. Incorporating play-based learning into your process can help children understand and develop better craftsmanship and patience when working with resin prints. Understanding the resin curing process is essential to achieving consistent and high-quality results, especially since proper curing can be influenced by the large numbers in resin volume measurement, ensuring accurate exposure times and optimal strength. Additionally, using verifiable performance fluids can further enhance your curing process by providing reliable and consistent results.
Enhanced Layer Adhesion
Effective wash-and-cure processes directly enhance layer adhesion by making certain residual uncured resin is thoroughly removed and the surface is properly hardened. When you follow proper curing times, the layers fuse more effectively, resulting in stronger bonds between each layer. This improves the overall structural integrity of your print, reducing the risk of delamination or cracking. Prioritizing resin safety during cleaning ensures you handle uncured resin responsibly, minimizing health hazards. Proper curing not only strengthens the part but also stabilizes the surface, making subsequent layers adhere better during multi-step prints. By focusing on thorough washing and accurate curing times, you optimize layer adhesion, leading to higher-quality prints with improved durability and precision.
Reduced Residual Resin
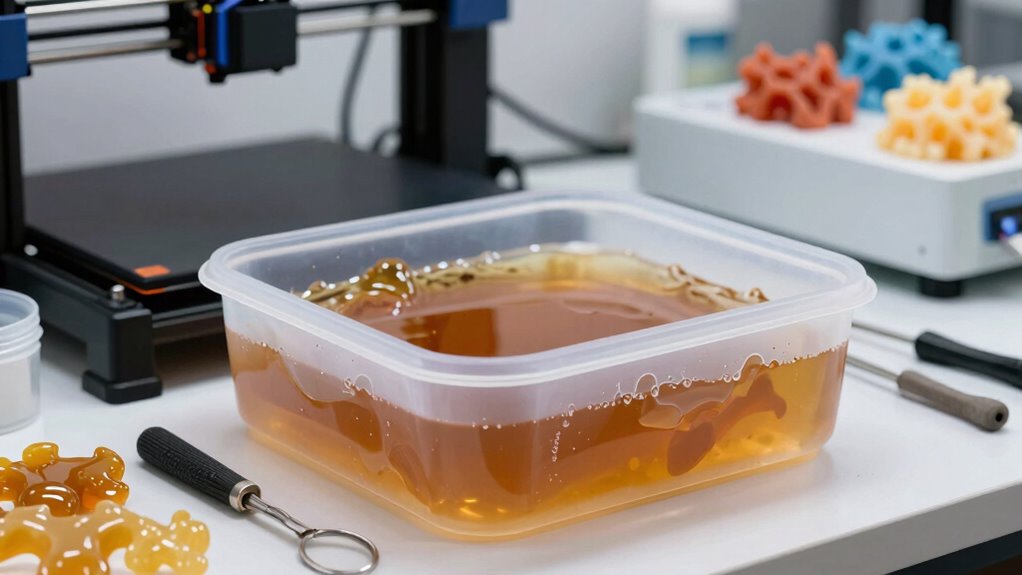
Why does residual resin matter so much in print quality? Leftover resin can cause surface imperfections and weaken the final model. Proper wash-and-cure routines remove excess resin, reducing resin toxicity and environmental impact. When residual resin stays on prints, it can release harmful chemicals, raising health and safety concerns. Additionally, leftover resin can lead to tacky surfaces and compromised detail. By thoroughly cleaning and curing prints, you minimize these issues, ensuring better accuracy and durability. Proper washing and curing also help preserve the print’s detail and overall integrity. Additionally, residual resin removal plays a crucial role in maintaining consistent print quality. Regularly inspecting and maintaining your document scanning equipment ensures optimal performance and results. Here’s a visual to clarify how residual resin impacts your print:
| Step | Effect | Result |
|---|---|---|
| Incomplete washing | Residual resin remains on surface | Increased toxicity, poor finish |
| Insufficient curing | Resin stays sticky and weak | Reduced durability, environmental waste |
| Proper wash-and-cure | Resin is fully removed and cured | Safer prints, less environmental impact |
| Surface quality | Cleaner surface | Enhanced detail and finish |
| Final safety | Lower resin toxicity | Safer handling and disposal |
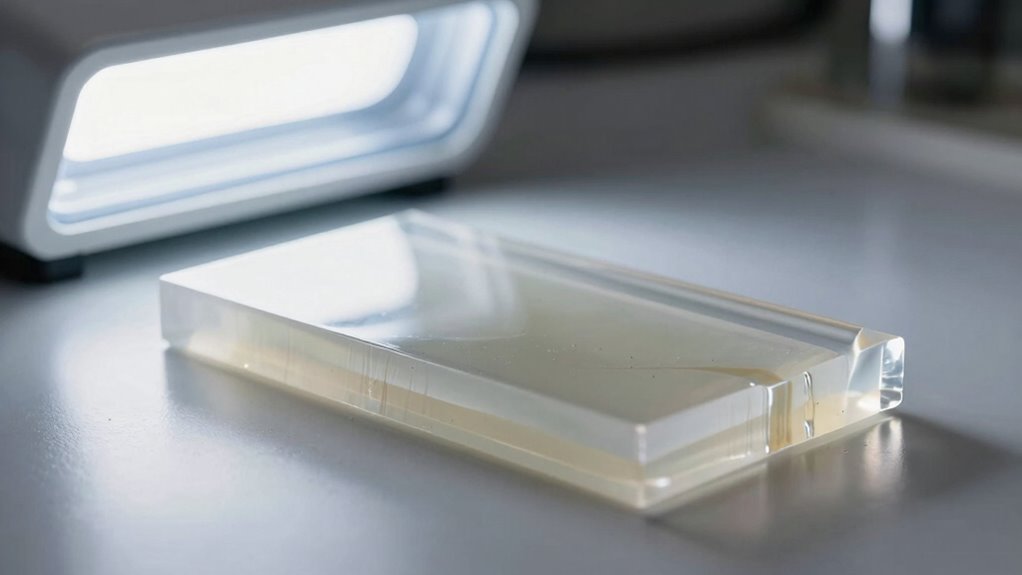
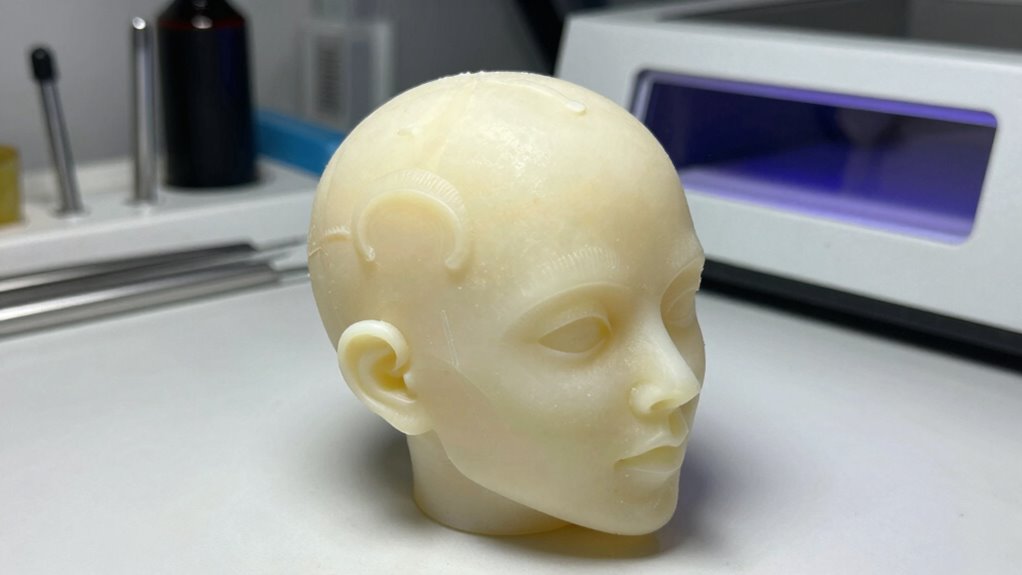
Improved Surface Finish
Achieving a smooth, detailed surface on your resin print depends heavily on the wash-and-cure process. Proper washing removes uncured resin, preventing surface imperfections, while careful curing ensures the resin fully hardens without warping. This process also helps in surface finish quality, which is crucial for professional-looking models. Careful curing ensures the resin fully hardens without warping. This combination results in better surface smoothing, reducing roughness and layer lines. During finish polishing, your print looks cleaner and more refined, highlighting fine details. An effective wash-and-cure routine minimizes post-processing work and enhances overall quality. When you follow the right steps, your resin models develop a professional, polished appearance. Properly cured prints are less prone to surface flaws like tackiness or cloudiness, making subsequent finishing steps easier. In short, a thorough wash-and-cure process directly improves surface finish, giving your prints that smooth, high-quality look every time.

52 Pcs Resin 3D Printing Tool Kit with 304 Stainless Steel Resin Filter Funnel,Silicone Pad, Scraper,Tweezers & Cleaning Tools | Accessories for Model Removal, Resin Recycling & Post-Processing
【Premium Stainless Steel Funnel & Filters 】 Our durable 304 stainless steel funnel ensures smooth resin pouring with…
As an affiliate, we earn on qualifying purchases.
As an affiliate, we earn on qualifying purchases.
Common Mistakes That Ruin Your Resin Prints

One of the most common mistakes that can ruin your resin prints is rushing the curing process or skipping steps altogether. Proper curing guarantees your print reaches its full strength and detail, but rushing can cause warping or incomplete hardening. Additionally, neglecting resin storage and chemical safety can lead to issues. Store resin in a cool, dark place to prevent degradation, and always handle chemicals with care. Failing to follow safety protocols not only risks your health but also affects print quality. Skipping thorough cleaning before curing leaves leftover resin that can cause surface imperfections or stickiness. Proper color calibration and consistent workflow practices are essential for achieving high-quality results. Avoid rushing steps, maintain proper resin storage, and prioritize chemical safety to ensure your prints come out flawless and durable. Incorporating proper safety measures can help prevent accidents and preserve your resin’s quality over time. Moreover, understanding resin handling techniques can significantly improve your overall print outcomes and safety practices. Engaging in water-based cleaning methods can also make the post-processing process safer and more environmentally friendly, especially when combined with proper ventilation techniques to reduce chemical exposure.

Resin Bubble Remover, Vacuum Chamber for Resins, Quick Remove Bubbles Within 10 Minutes, 96kPa High-Pressure Vacuum Pump, Compact Epoxy Machine for DIY Jewelry Arts Crafts Making Gray
High-Pressure Vacuum Technology: Our resin bubble Remover utilizes high-pressure vacuum technology to quickly and effectively remove air bubbles…
As an affiliate, we earn on qualifying purchases.
As an affiliate, we earn on qualifying purchases.
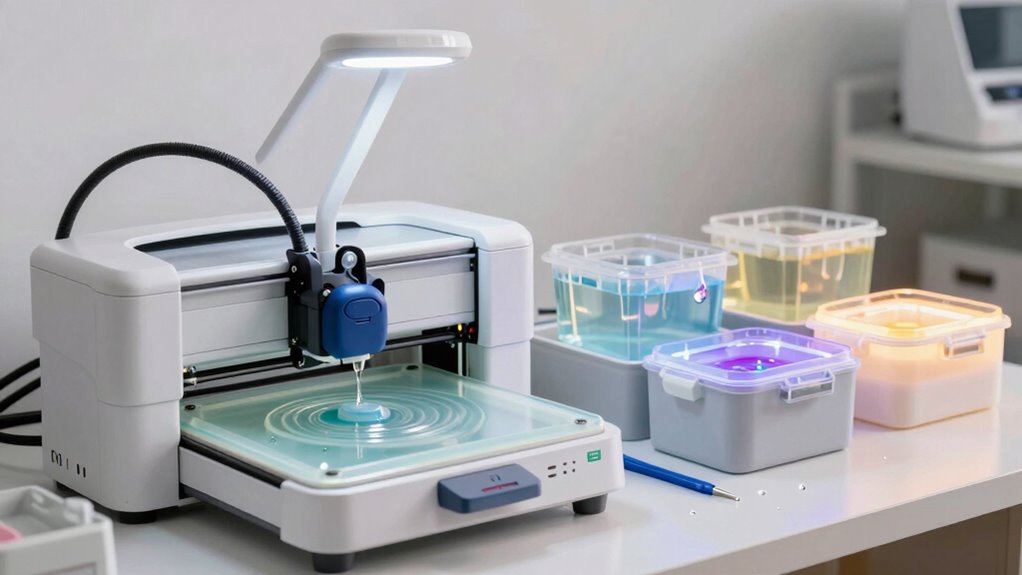
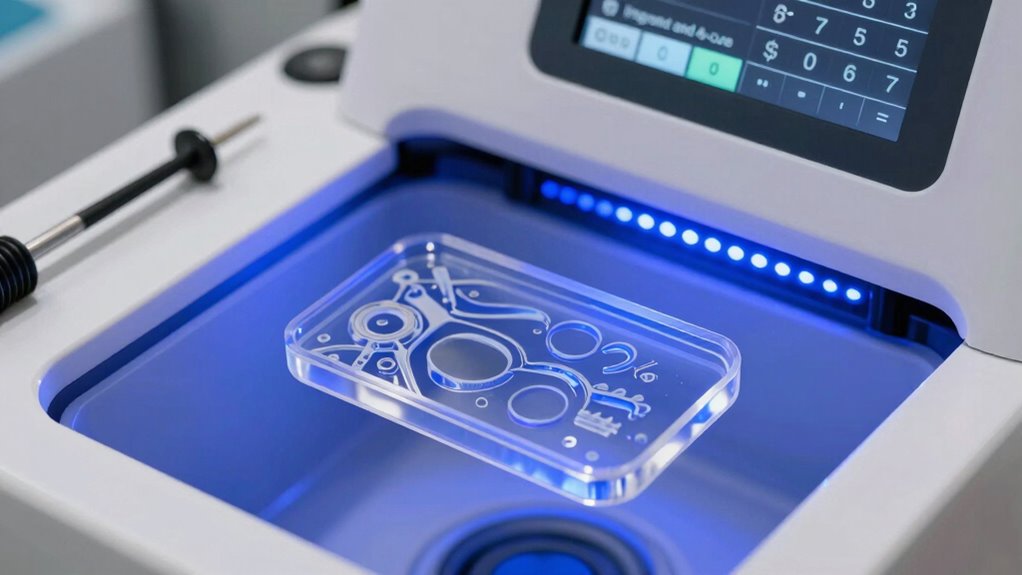
Step-by-Step Guide to an Effective Wash-and-Cure Routine
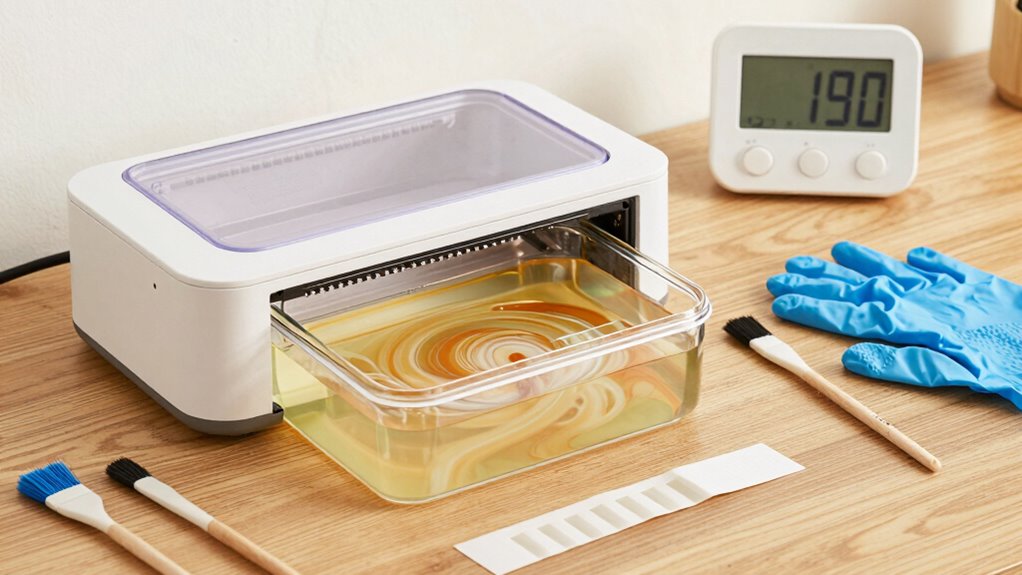
A proper wash-and-cure routine is essential for guaranteeing your resin prints reach their full potential in quality and durability. Start by rinsing your print in isopropyl alcohol or a dedicated wash solution, gently agitating to remove uncured resin without damaging details. Follow this with a thorough rinse under running water if needed. Next, dry the print completely. For curing, position your print in a curing station and set the appropriate curing parameters—adjust time, light intensity, and temperature based on your resin’s chemistry. Consistent curing ensures proper cross-linking, optimizing strength and surface finish. Always monitor resin-specific curing guidelines, as variations in resin chemistry impact the ideal curing process. Proper resin handling techniques are crucial to achieving high-quality results. Additionally, maintaining clean workspace practices can prevent contamination and defects during the post-processing steps. This step-by-step approach guarantees your prints are strong, detailed, and long-lasting.
Tools and Tips for Consistent Resin Post-Processing
Having the right tools on hand is essential for guaranteeing your resin post-processing remains consistent and efficient. Invest in a dedicated container for resin storage to keep your resin fresh and prevent contamination, which can affect curing results. Use a digital thermometer to monitor and maintain the ideal curing temperature, as inconsistent temperatures can lead to uneven curing or warping. A sturdy, adjustable curing station helps ensure uniform light exposure and temperature control. Keep alcohol or specialized cleaning solutions nearby for thorough cleaning during wash steps. Label your tools and storage containers to avoid cross-contamination. Regularly inspect and calibrate your equipment, and establish a routine to guarantee each print receives the same high-quality finish every time. Discover a free tool to transform text capitalization styles to make labeling and instructions clearer and more professional. Paying attention to proper backyard setup can also help streamline your workflow and improve overall results, especially when considering indoor air quality and the effects of dust or microplastics on your workspace. Additionally, understanding the importance of resin storage conditions can greatly influence the longevity and consistency of your prints. Properly managing temperature fluctuations during curing is essential for achieving optimal results and preventing defects.
Fixing Common Wash-and-Cure Issues

Are you struggling with issues like tacky surfaces, warping, or incomplete curing? These common problems often stem from improper wash-and-cure techniques. To fix tacky surfaces, make sure you’re using effective cleaning solutions that thoroughly remove residual resin, and consider rinsing with clean water or alcohol. Warping can result from uneven curing or exposure to excessive heat, so verify your curing times and temperature settings. Incomplete curing may be addressed by extending the curing duration or adjusting light exposure. Resin recycling can also impact quality if leftover resin isn’t properly filtered and cleaned, leading to surface imperfections. Always clean your prints carefully and use proper cleaning solutions to achieve consistent results. Proper post-processing ensures your prints are fully cured, stable, and ready for use. Additionally, understanding regional flavor profiles and pairing techniques can enhance the overall experience of your finished pieces. Paying attention to resin properties and their influence on curing and finish can help prevent many common issues.
How Proper Post-Processing Extends Resin Print Durability
Proper post-processing strengthens the bond between resin layers, making your prints more resistant to cracking and breaking. It also helps prevent surface damage that can weaken the overall structure over time. By following the right steps, you guarantee your prints last longer and maintain their quality.
Enhances Resin Bond Strength
Effective wash-and-cure processes play a crucial role in strengthening the bond between resin molecules, which directly impacts the durability of your print. Proper post-processing ensures ideal cross-linking, making your print more resistant to stress and wear. To achieve this, you must consider material compatibility and adjust curing parameters accordingly. Different resins require specific curing times and light intensities for maximum bond strength. Here’s a quick guide:
| Resin Type | Curing Time | Light Intensity |
|---|---|---|
| Standard | 60 seconds | Medium |
| Flexible | 45 seconds | Low |
| High-Detail | 75 seconds | High |
Matching these factors guarantees stronger bonds, extending your print’s lifespan and performance.
Prevents Surface Damage
When you carefully follow the wash-and-cure process, you considerably reduce the risk of surface damage that can weaken your print over time. Proper post-processing preserves surface integrity and prevents cracks or roughness. To achieve this, consider:
- Using compatible cleaning solutions that match your resin’s chemical compatibility, avoiding harsh chemicals that could degrade the surface.
- Ensuring environmental considerations are met by working in well-ventilated areas and disposing of waste responsibly.
- Applying gentle curing techniques to prevent overexposure, which can lead to surface warping or clouding.
Integrating Wash-and-Cure Into Your 3D Printing Workflow
Integrating wash-and-cure steps into your 3D printing workflow guarantees your prints are both high quality and durable. Understanding resin chemistry helps you choose the right cleaning agents and curing methods, ensuring best results. During post-processing techniques, proper washing removes uncured resin, reducing surface tackiness and improving detail. Curing stabilizes the resin’s polymer bonds, enhancing strength and accuracy. Incorporate a dedicated wash station and a consistent curing process to streamline your workflow. This integration minimizes errors and saves time, while also preventing issues like warping or surface imperfections. By making wash-and-cure a standard step, you maximize the benefits of your resin’s chemistry, producing models that are not only visually precise but also mechanically resilient.
Final Tips for Perfect Resin Models Every Time
Achieving perfect resin models every time hinges on following key finishing steps and attention to detail. Understanding resin chemistry and proper curing times is vital to guarantee your model reaches its full potential. For best results, consider these tips:
- Optimize curing times – Follow manufacturer guidelines closely, as over-curing can lead to brittleness, while under-curing leaves surfaces tacky. Proper curing solidifies the resin’s properties.
- Ensure thorough washing – Remove excess resin and residual chemicals to prevent surface imperfections that can affect curing and finish quality.
- Refine post-processing – Sand, prime, and paint with care to highlight details and achieve a smooth, professional look. Precision in each step guarantees consistent, high-quality models.
Frequently Asked Questions
How Does Wash-And-Cure Impact Resin Print Strength and Longevity?
Wash-and-cure greatly impacts your resin print’s strength and longevity by enhancing material compatibility and surface finish. Proper washing removes residual resin that can weaken the part, while curing solidifies the material, boosting durability. This process guarantees better layer adhesion and reduces surface imperfections, which can lead to cracks or wear over time. Following a suitable wash-and-cure workflow helps your prints last longer and perform better in their intended applications.
Can Improper Wash-And-Cure Lead to Health or Safety Issues?
Ignoring proper wash-and-cure steps can cause serious health risks, like chemical exposure that’s as dangerous as a wildfire. If you skip hygiene protocols, you might inhale toxic fumes or come into contact with harmful residues, risking skin or respiratory issues. Always follow safety guidelines, wear protective gear, and guarantee proper ventilation to prevent health hazards. Neglecting these precautions turns a simple process into a potential safety nightmare.
What Are the Environmental Considerations for Resin Post-Processing?
When considering resin post-processing, you should prioritize eco-friendly solvents to minimize environmental impact. Use biodegradable or less toxic cleaning agents to reduce harmful waste. Implement recycling practices for leftover resin and wash water, ensuring they’re disposed of responsibly. By adopting these habits, you help protect the environment, promote sustainable manufacturing, and reduce your carbon footprint, making your workflow more environmentally conscious and aligned with green principles.
How Does Wash-And-Cure Workflow Differ Between Resin Types?
You’ll find that wash-and-cure workflows differ based on resin compatibility, as each resin type responds uniquely to specific curing techniques. For example, standard resins may need gentle curing with lower UV intensity, while specialty resins, like flexible or high-temperature ones, require tailored curing parameters. Always check the resin manufacturer’s recommendations to optimize your workflow, ensuring proper curing and avoiding issues like warping or incomplete hardening.
Is It Necessary to Invest in Professional-Grade Wash-And-Cure Equipment?
Yes, investing in professional-grade wash-and-cure equipment can be worthwhile. It boosts cost efficiency by reducing material waste and post-processing time, saving you money in the long run. Plus, it offers user convenience through streamlined, consistent cleaning and curing, ensuring high-quality results with less effort. While the upfront cost is higher, the improved workflow and final product quality make professional gear a smart choice for serious hobbyists and professionals alike.
Conclusion
Mastering the wash-and-cure process is like tending a garden—you’ll see your resin prints flourish with proper care. Don’t get dazzled by high resolution alone; a solid post-processing routine ensures your models not only look great but last longer. By embracing these steps, you’re planting the seeds for consistent, professional results every time. Remember, in 3D printing, it’s the gentle nurture that truly makes your creations stand out.